Tuesday, October 29, 2013

Hackaday Trinket Contest


I designed 6 custom characters for use with a HD44780 compatible LCD display.

Arduino code is available here --> https://gist.github.com/gigawatts/7209525

Saturday, February 19, 2011

Stupid Hack #2

I seemed to have gotten off on a tangent of "Useful" hacks recently, which goes against the name of this here blog. So, in the spirit of "Stupid" hacks, I present Stupid Hack #2!

From ‹‹ Stµpid Hax ››


You may recognize the 2-outlet box from my "Fonera Automated Reset Technology" post I made previously. Since I am no longer using internet from Comcast, I am not plagued with modem freezes anymore (Hurray!). As a result, this device I built has been sitting around without much of a purpose recently.

The other night I was thinking about what I could use it for, and came up with this idea. I am using a 5 volt power supply to trigger the 5 volt relay inside the outlet box. As you may recall, I spit the two outlets inside the box so one outlet is on the normally open side of the relay, and the other is on the normal closed side. So I plug the 5 volt power supply into the "Surge Protection Only" half of the UPS, and the outlet box into the "Battery powered" half. I plug a lamp into the "Normally Closed" side of the outlet box (which is "open" as long as the 5 volt PSU is powered up). As soon as the power goes out, the 5 volt PSU losses power, flipping the relay back to Normally closed, thus turning on the lamp.

Very simple and dare I say it... useful? (Damn, I failed at creating something useless once again!)

Anyway, it's a great way of giving yourself some emergency work light when everything else in the house is off.


Here's a quick demonstration video:

Thursday, September 30, 2010

USB Hub Inside A Logitech Gaming Mouse

Here I have an older Logitech G5 gaming mouse that was in need of some help. The middle click button on the PCB was worn out, so it liked to randomly middle click all the time. While I had it apart replacing the button, I realized how much space was actually inside (since I don't use the weight cartridge at all) and thought it would be awesome to shove a small USB hub inside, with ports accessible from the outside via the weight cartridge slot. Here is what I ended up with...


You can access the two USB ports from the bottom of the mouse


Inside the mouse, the hacked up USB Hub


The USB hub was cut in half, eliminating the 3rd and 4th ports to allow it to fit inside the mouse. The thicker yellow and green wires are carefully soldered to the traces that previously went to the 3rd USB port's D+ and D- data lines.


Another shot inside (hooray for hot glue!)


One more shot inside, here you can also see the middle click button I replaced (just to the right of the spring)


Shot of a Flash drive inside the mouse


The small flash drive/MicroSD card adapter I used inside the mouse


Powered on with 2 flash drives mounted


The final product, looking just like a stock G5, but with flash storage!


I actually completed this hack several months ago, but forgot to post it here until now. Let me know what you guys think.

Happy Hacking!


Post-Note: After reading some of the comments I have gotten on HackaDay and LifeHacker, it seems this is what they believe I am doing with my USB Hub Mouse:


Now that's just silly!


Here is a short video I just took of the mouse being used as I originally intended.

Monday, February 8, 2010

Fonera Automated Reset Technology (take THAT comcast...)

Recently, our Comcast internet service has been less than ideal. Some strange interference on the cable line is causing our modem to freak out every so often. After talking to countless technicians and service reps and going through 2 or 3 modems trying to determine the problem, I decided to take matters into my own hands.

The main problem was that the modem would freeze after this mysterious event would knock it offline. The only way to re-establish a connection would involve power cycling the modem. This became very annoying when the modem was freezing as often as every 20 minutes at it's worst.

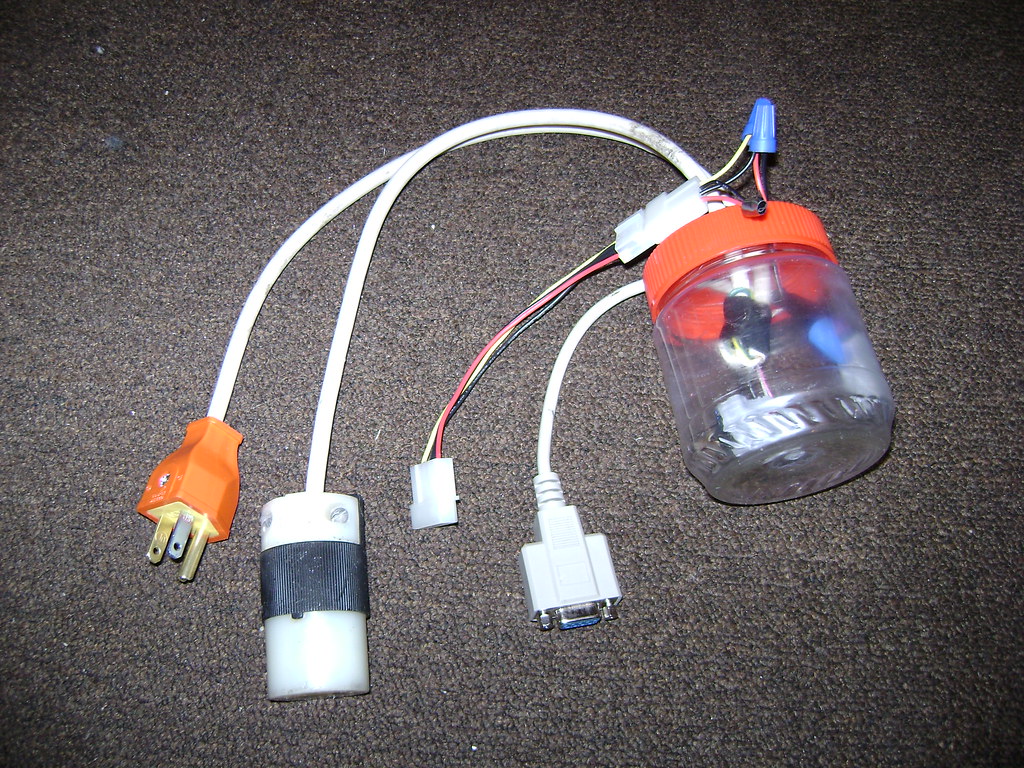
I decided to come up with a solution to replace the task of manually power cycling the modem and to automate it with something aware of internet connectivity. My first thought was to use the RTS pin on a serial port to trigger a relay. I threw together a circuit from parts I had lying around including a transistor, a relay, a female DB-9 connector, and a molex connector (to connect to the PSU of my DD-WRT x86 router for the 12v coil on the relay) and a peanut butter jar for a simple enclosure. This was the end result, which sorta worked (it didn't like long serial extension cables, probably too much voltage drop).

(Original prototype)


After thinking about it for a while, I realized I wanted something more "embedded" and easier to implement (ie, not requiring a PC) and decided to try and use the GPIO pins on a Fonera wireless router. The Fon was a perfect device for the job since it already had a network connection and did not need a whole lot of power to operate 24/7.

The first step was to lookup pinouts for the Fon and determine where the best connection was to an available GPIO pin, power and ground. After some research, this is what I came up with.


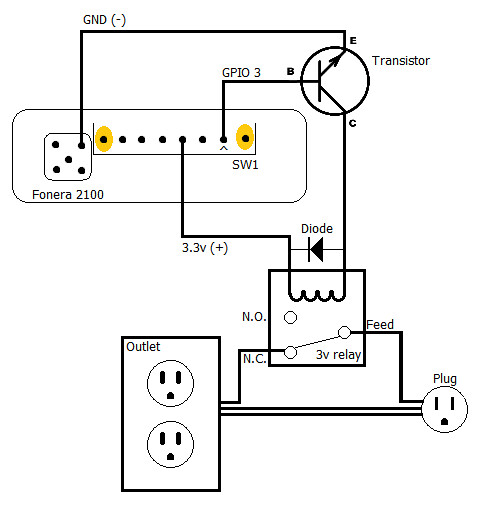
I soldered in some wires and began work on the relay circuit. I used a small NPN transistor connected to the GPIO pin to power the relay (the GPIO itself could not source enough current to trip the coil). Below is the circuit diagram I came up with (after the fact).

(New Schematic, I had the transistor implemented wrong in the original diagram)


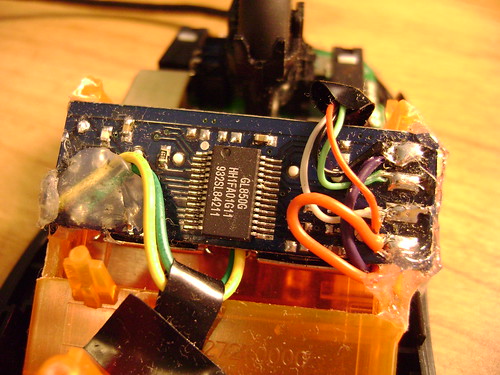
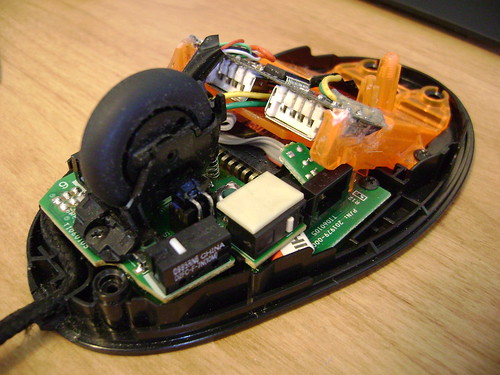
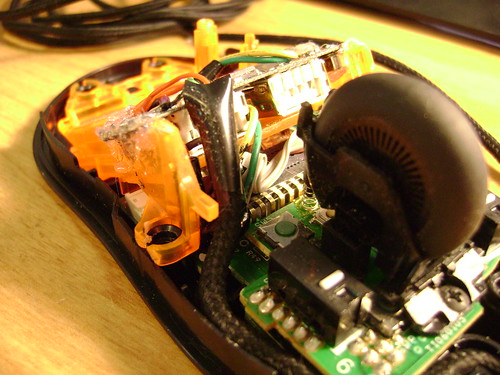
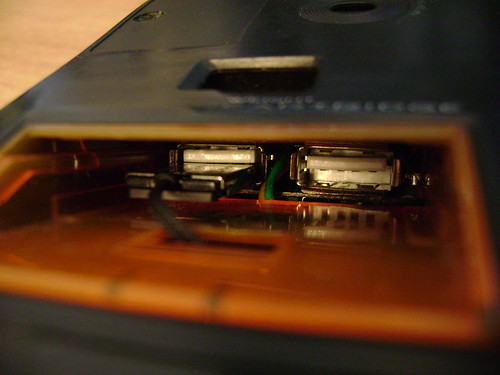
Here is the half of the circuit inside the Fon, with the NPN transistor connected to the GPIO pins


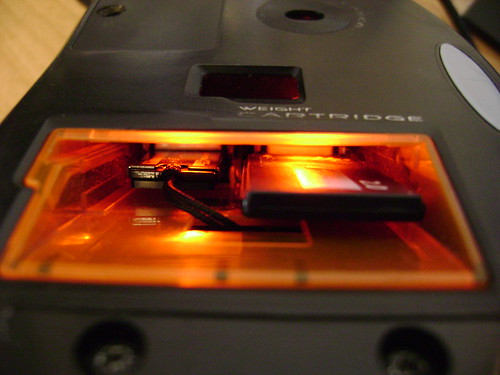
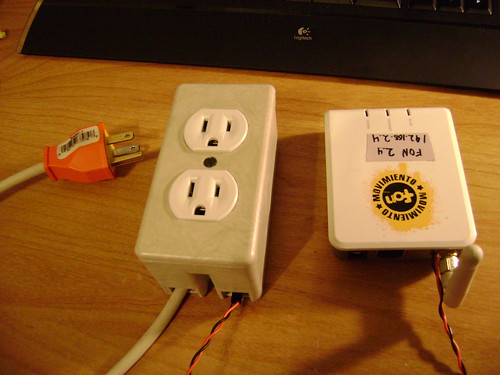
Here is the half of the circuit inside the outlet box, with the relay and a generous amount of hot glue :) (Note: I cut the little metal bridge between the two outlets so that I could have one normally open, and one normally closed)


And the finished product!


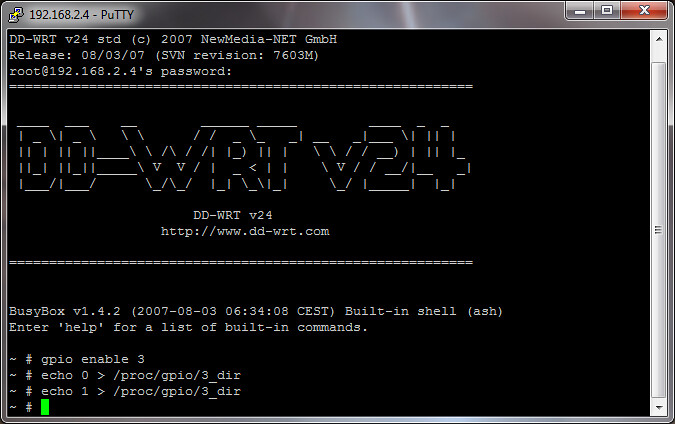
These are the commands I used to turn the GPIO pin on and off


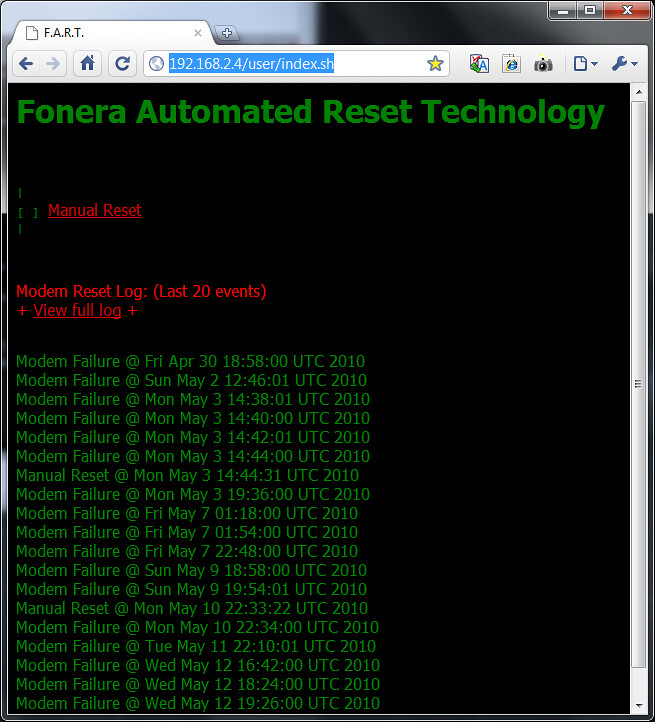
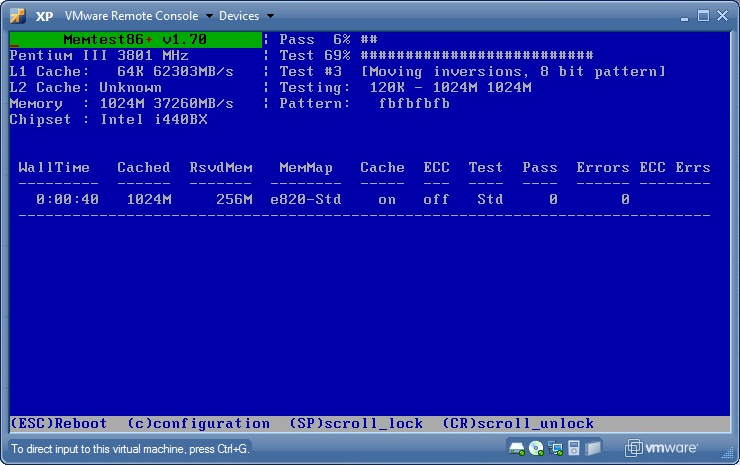
Then, I created a simple web interface with a "Manual reset" button, a short log of the last 20 events, and a link to view the entire log (which got pretty long after a while).
(Click the image for a larger version)


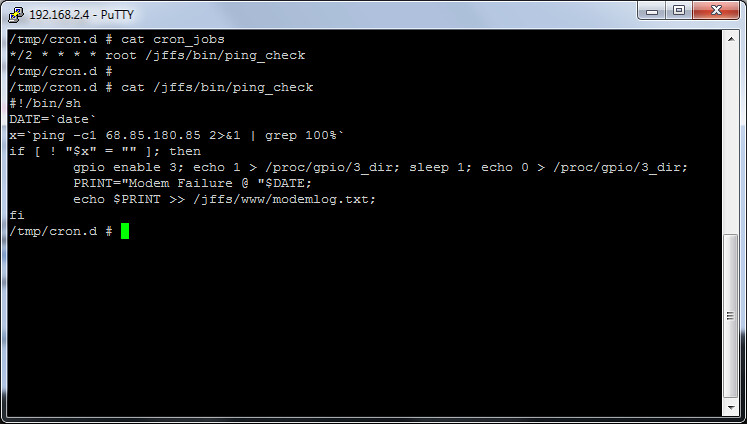
I also created a simple ping script and a cron job which ran every 2 minutes, pinging a comcast gateway (it was the first IP address out side the modem I hit when I ran a trace route)


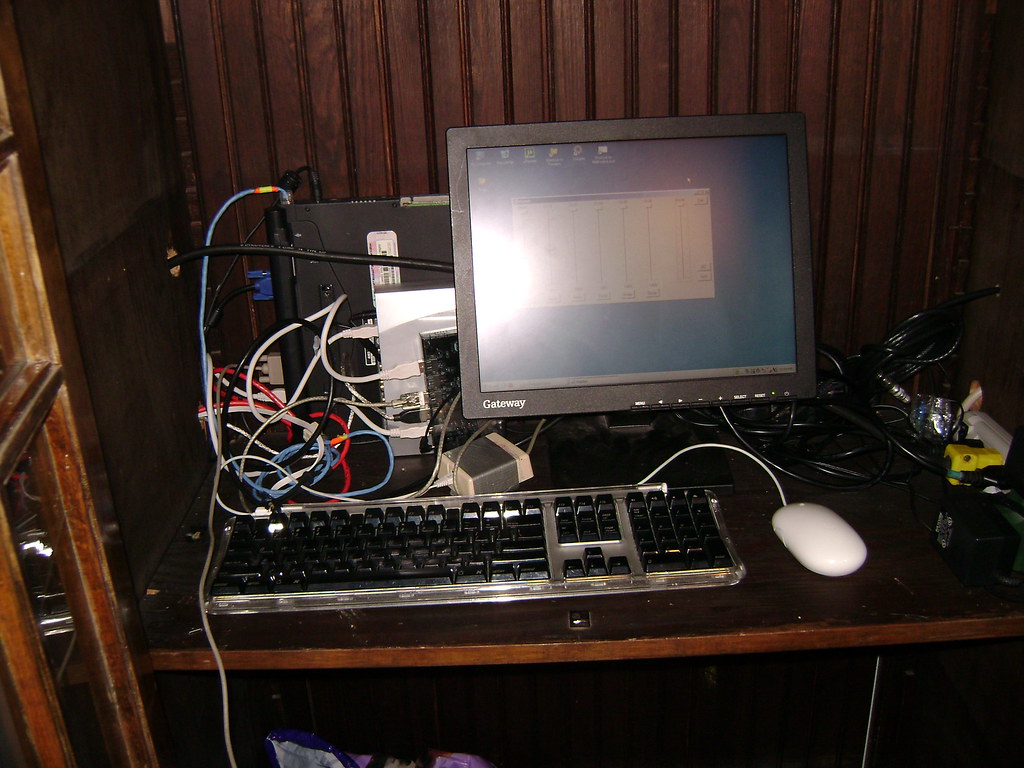
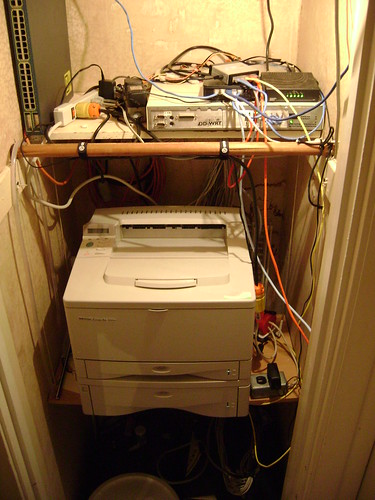
And finally, the finished product in use! (this was an earlier revision, when the relay was still being housed in the peanut butter jar) You can see the Fonera and the outlet box with the modem's wall-wort to the right of the printer.
(Click the image for a larger version)


All in all, this was a very fun project and it seems to do it's job very nicely. The only time we experience any problems now is when the cable line is so noisy that the modem takes more than two minutes to re-sync, and goes through a couple resets before it's good again.

I hope this information can help someone else build a similar device to fix a similar problem (I know there are lots of frustrated comcast customers out there that this project might help). If you come across something in my write up that doesn't make sense, or needs clarification, leave a comment or otherwise contact me and I'll try to help you out as best I can.

Happy Hacking!

Thursday, December 31, 2009

Christmas Decorations 2009

Two years ago I first created my Mountain Dew Christmas tree, consisting of around 200 Mountain Dew cans, construction flags, a 7ft piece of PVC pipe, and a Christmas Tree stand. After I had finished putting it together for the first time, decorating it seemed like a lot of extra effort.


This first version of the tree in 2007

This year, I decided to get a little more creative with the decorations. After having purchased a couple extra strings of LED Christmas lights and being given the star and tinsel from my grand parents old tree, I set to working sprucing up my once bare aluminum tree.


This year's version 2.0

I also made the decision at some point to have the tree be controllable from a computer. I had obtained a few old MIDI Leprecon LD-360 dimmer packs and decided to put one to use. Each unit has 6 channels which each receive a MIDI address. You can then send MIDI commands from a computer or MIDI keyboard to change the intensity on any of the channels. I had a M-Audio Audiophile USB sound card with MIDI output which I plugged into an old laptop and stuck in a cabinet. Then I found a command line based midi program which could send raw Note ON and Note OFF messages to the dimmer pack. I whipped up a small VB.net program which would run the command line program with the variable from the VB program's faders.


The "Server Cabinet" next to the tree


Example of some Leprecon dimmer packs


The laptop server powering the tree, running the VB application

Although pretty crude, it worked extremely well for my purpose. I also created two simple batch scripts which would turn all the channels on and off, and made them scheduled tasks to turn the tree on in the evening (around 4pm) and off later that night (around 1am).

Having received an Arduino for Christmas this year, I intend to remove the PC from the equation for next year, allowing the tree to be controlled via micro controller from the network.

All in all, I very much enjoyed setting up my tree again this year, and intend to make it a tradition to try and do so every year.


For more pictures of my Mountain Dew Christmas tree, including some of the original construction pictures, visit my Flickr set here

Thursday, June 18, 2009

Stupid Hack #1

To get an idea of the kinds of "Stupid Hax" we are talking about, I'll start you out with this one.

A friend of mine wanted to know what would happen if you ran a RAM tester, such as MemTest86+, in a virtual machine. So after firing up a new virtual machine in VMWare Server on my Windows 7 Desktop and mounting an Ubuntu disk with Memtest on it, this was the result.


(Click for larger image)


Nothing too exiting, but Memtest does indeed run and test the virtual RAM allocated to the virtual machine.

What would it have meant if it was showing errors in my virtual RAM? I don't think I really want to know the answer to that...


P.S. If anyone likes what they see here, and has any suggestions for some "Stupid Hax" they would like to see attempted, feel free to comment and give me some suggestions!

Welcome to the Stupid Hax blog!

This blog site is dedicated to all those strange and stupid hacks you may have pondered about while bored, but quickly realized how silly the outcome would actually be.

While, clearly having too much free time on my hands every once in a while, some of those hacks have come to life, and I will document them here.

Enjoy!


*** DISCLAIMER ***
*** Warning!! Not all hacks listed here are pointlessly stupid! Some have actually turned out quite useful! ***